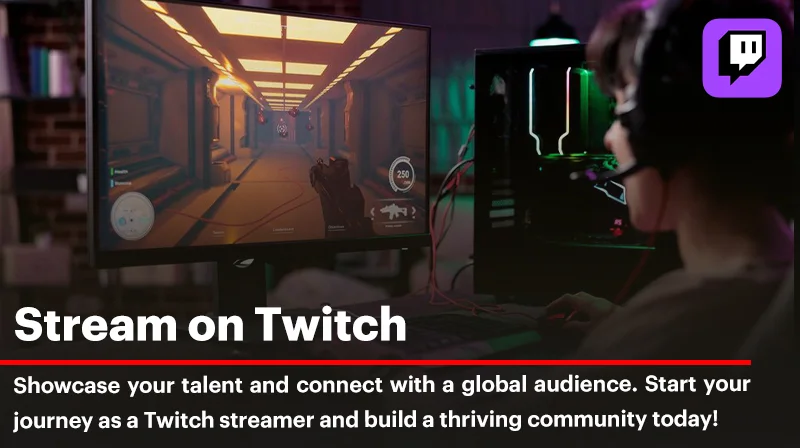
If you’re looking to stream on Twitch and grow your audience, you’re in the right place. In this guide, we’ll take you through the entire process of streaming on Twitch, providing a step-by-step breakdown, along with valuable insights on the optimal times to stream for the greatest exposure. Whether you’re a gaming enthusiast, a creative professional, or someone with unique content, this guide will help you get started and succeed on Twitch.
Important recommendation: As you grow your presence on Twitch, consider utilizing services like buy Twitch views or buy Twitch live views. These tools can give your channel an initial boost, helping you get noticed by more viewers quickly.
Complete Step-by-Step Tutorial on How to Stream on Twitch
Step 1: Create a Twitch Account
1. Visit the Twitch Website: Go to Twitch.tv.
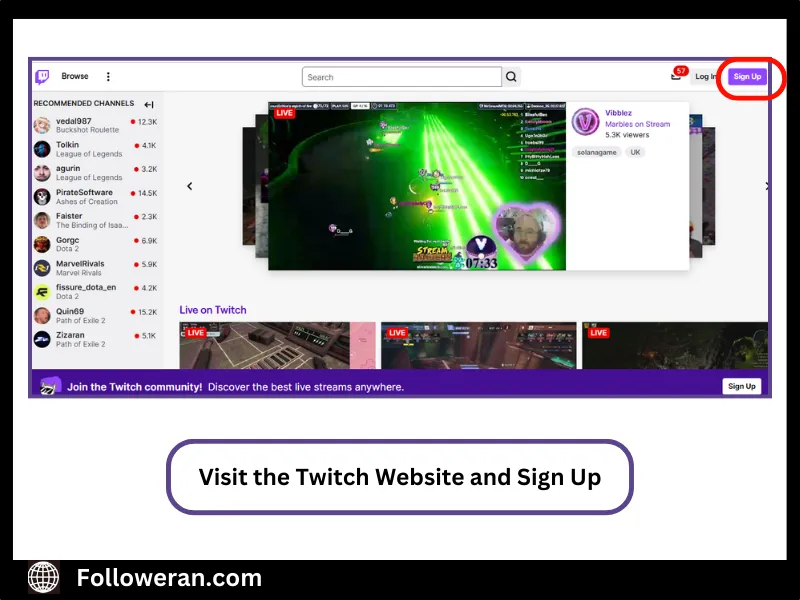
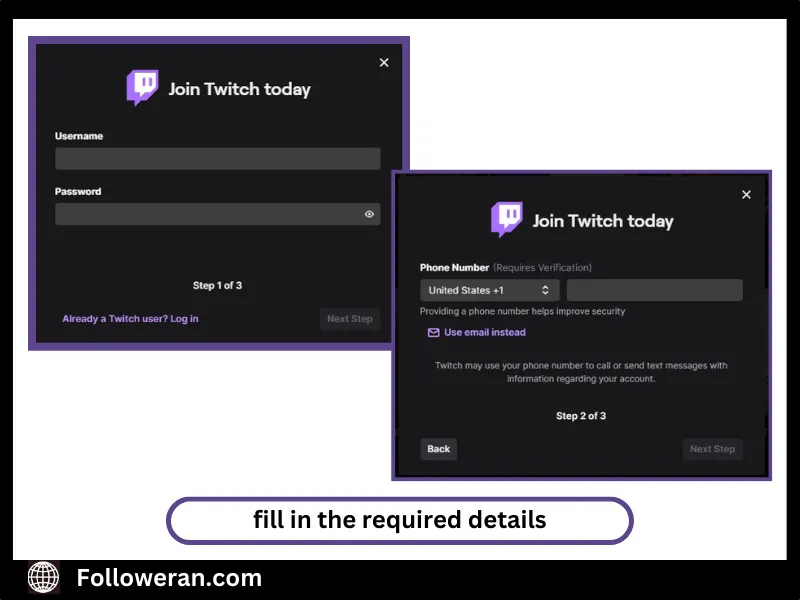
2. Sign Up: Click on the “Sign Up” button and fill in the required details (username, password, email).
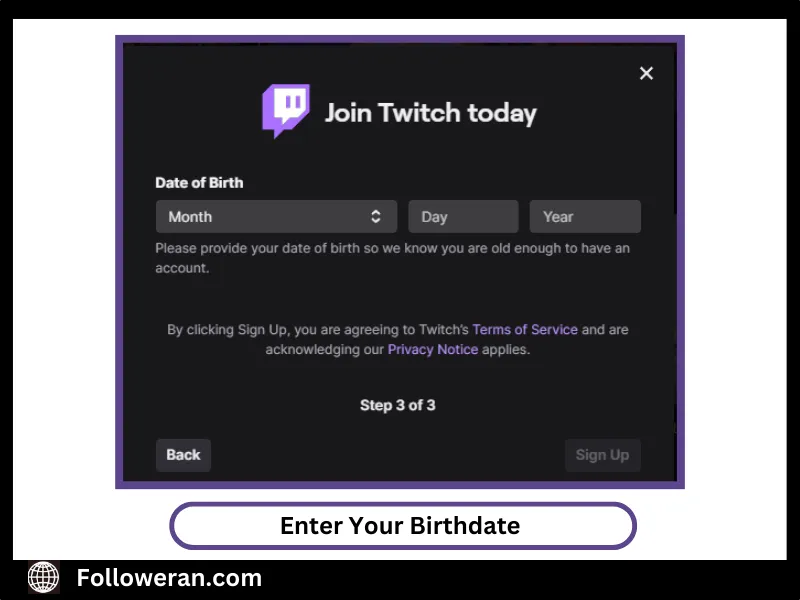
3. Enter Your Birthdate: You must enter your date of birth as Twitch requires users to be at least 13 years old.
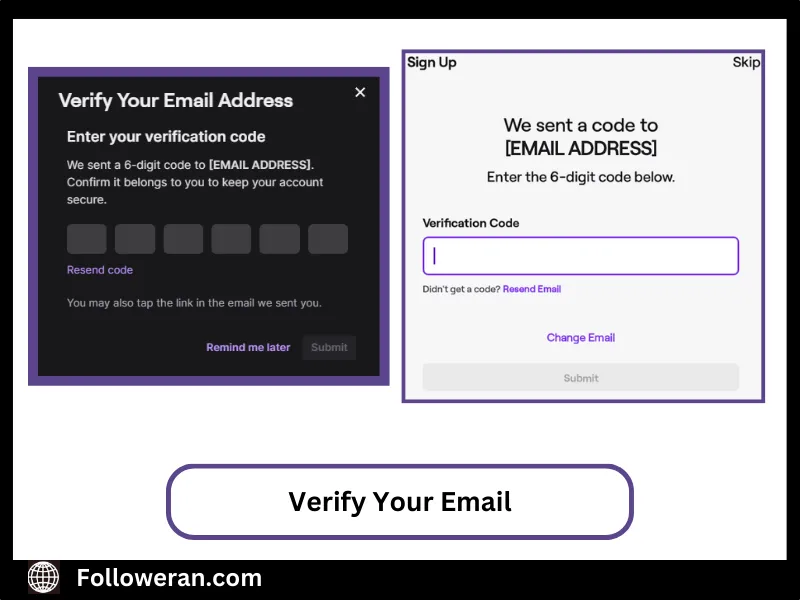
4. Verify Your Email: Check your email for a verification link and confirm your account.
5. Enable Two-Factor Authentication (2FA): For added security, set up 2FA by following the prompts in your account settings. This requires a mobile number for verification.
Step 2: Download Streaming Software
1. Choose Your Software: The most popular choices are OBS Studio (Open Broadcaster Software) and Streamlabs OBS.
2. Download and Install: Visit the official website of your chosen software (e.g., obsproject.com and download the appropriate version for your operating system.
3. Run the Installer: Follow the installation instructions to set up the software on your computer.
Step 3: Connect Twitch to Your Streaming Software
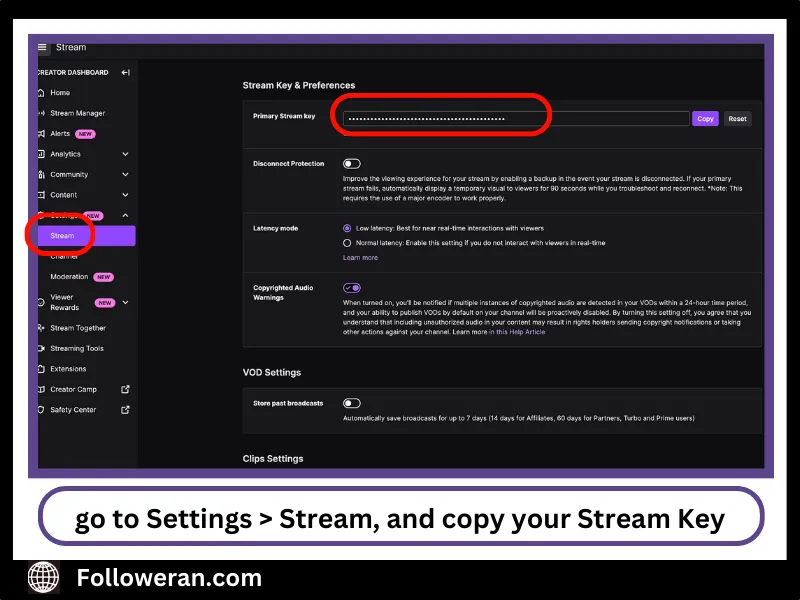
1. Access Your Stream Key: Navigate to the Twitch Creator Dashboard, go to Settings > Stream, and copy your Stream Key.
2. Open Your Streaming Software: Launch OBS or Streamlabs.
3. Connect to Twitch:
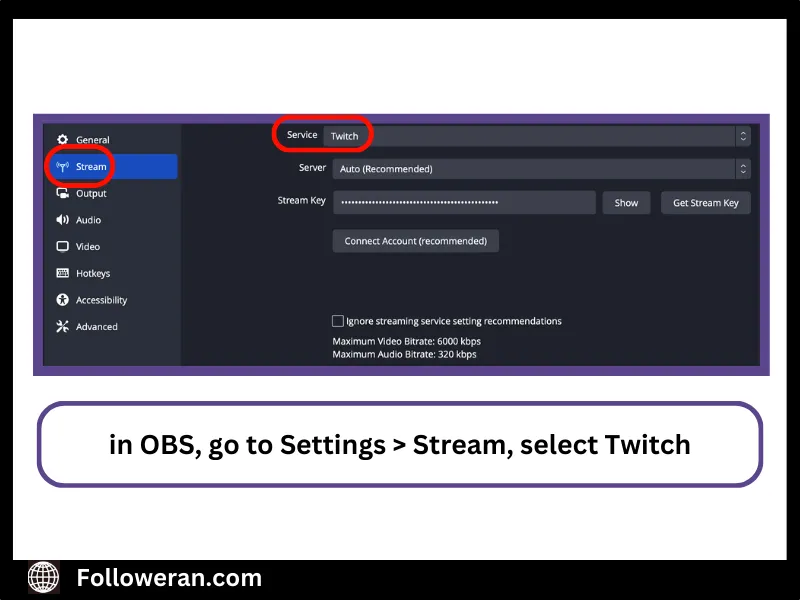
– In OBS, go to Settings > Stream, select Twitch as the service, and paste your Stream Key.
– In Streamlabs, go to Settings > Account Linking and log in with your Twitch account.
Step 4: Set Up Your Stream Settings
1. Configure Video Settings:
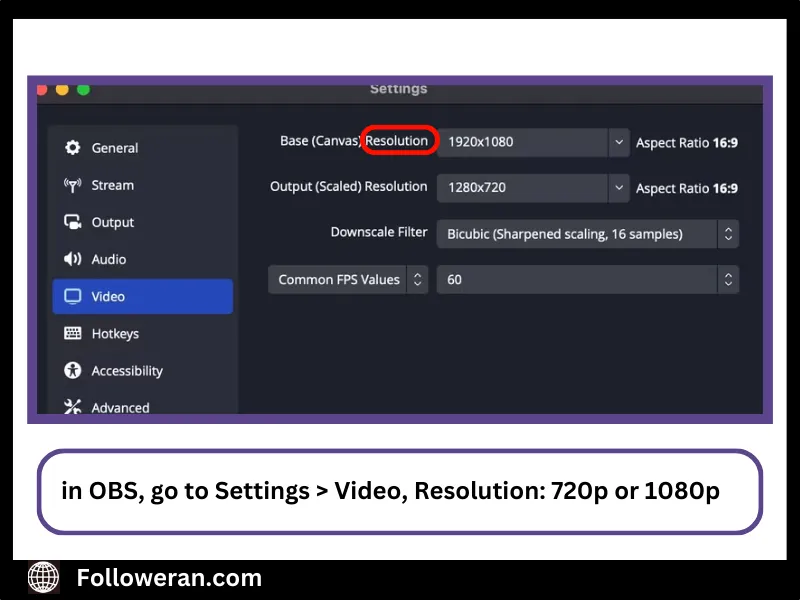
– Resolution: Set it to 720p (1280×720) or 1080p (1920×1080) for better quality.
– Frame Rate: Choose between 30 FPS or 60 FPS depending on your content type.
2. Adjust Bitrate:
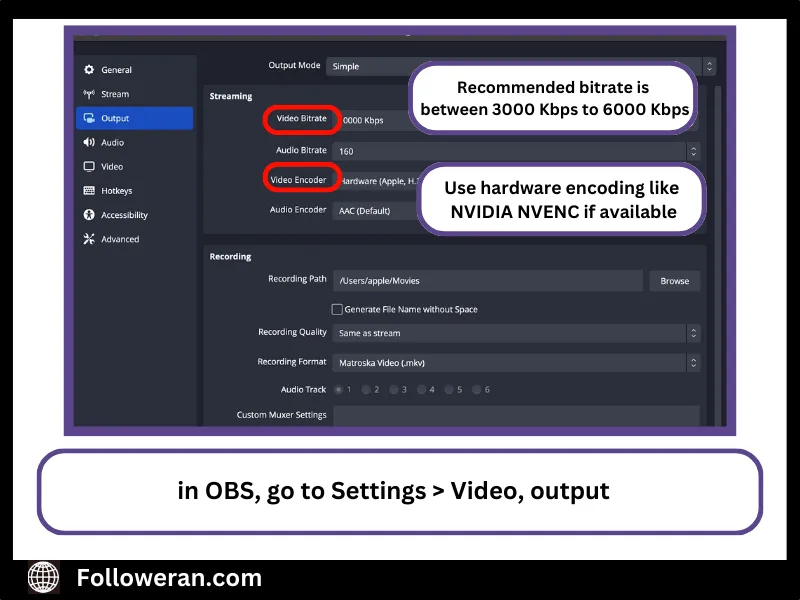
– Recommended bitrate is between 3000 Kbps to 6000 Kbps for high-quality streams.
3. Choose Encoding Options:
– Use hardware encoding like NVIDIA NVENC if available; otherwise, opt for x264.
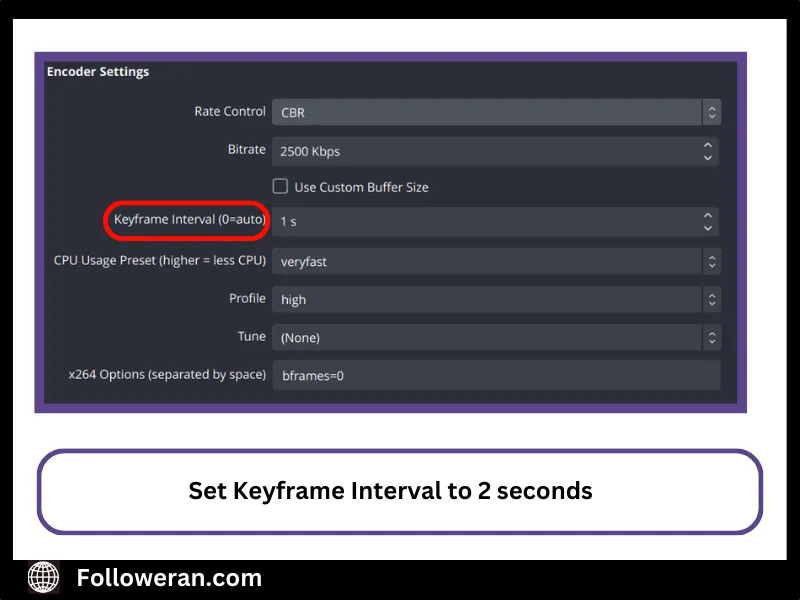
4. Set Keyframe Interval: Set this to 2 seconds for optimal performance.
Step 5: Add Your Webcam and Microphone
1. Connect Devices: Ensure your webcam and microphone are connected to your computer.
2. Add Sources in OBS/Streamlabs:
– Click the “+” button in the Sources box, select “Video Capture Device” for the webcam, and “Audio Input Capture” for the microphone.
3. Positioning: Adjust the size and position of your webcam feed so it doesn’t obstruct important gameplay elements.
“If you’re deciding between platforms, it’s important to understand the differences in YouTube game streaming vs Twitch, as each offers unique benefits for streamers.”
Step 6: Customize Your Stream with Overlays
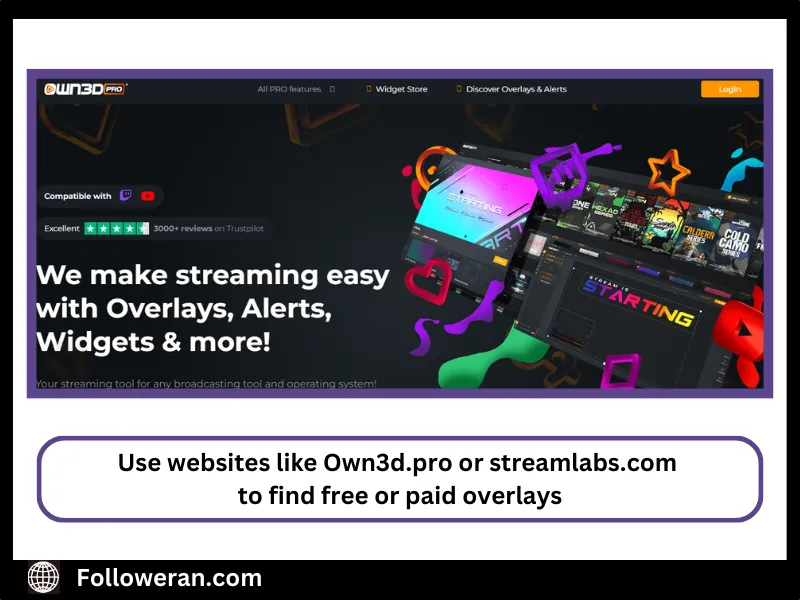
1. Find Overlays: Use websites like Own3d.pro or streamlabs.com to find free or paid overlays.
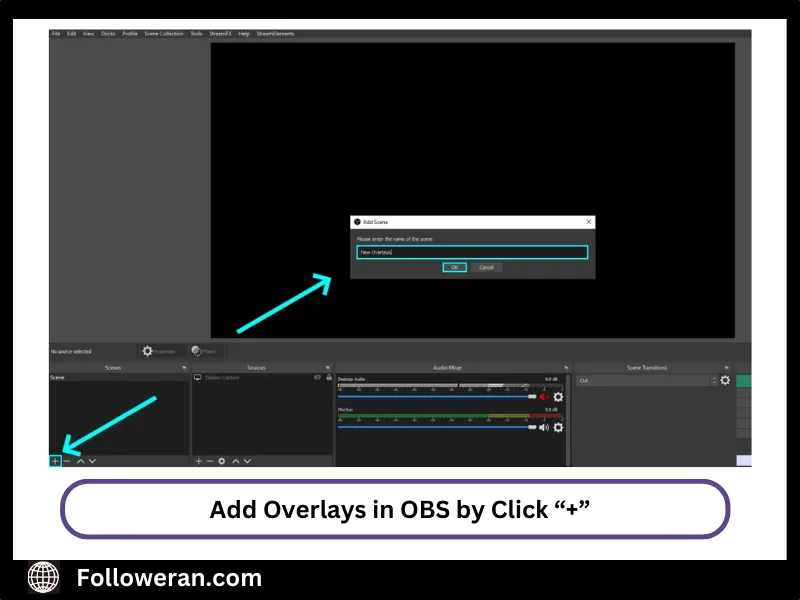
2. Add Overlays in OBS/Streamlabs:
– Click “+” in Sources and select “Image” or “Browser Source” to add overlays or alerts for followers/donations.
Step 7: Prepare Your Scene
1. Create Multiple Scenes: Set up different scenes for gameplay, chatting, or breaks by clicking on the “+” button under Scenes in OBS/Streamlabs.
2. Preview Your Layouts: Make sure everything is positioned correctly before going live.
Step 8: Go Live!
1. Check Everything Again: Ensure all sources are active and audio levels are balanced.
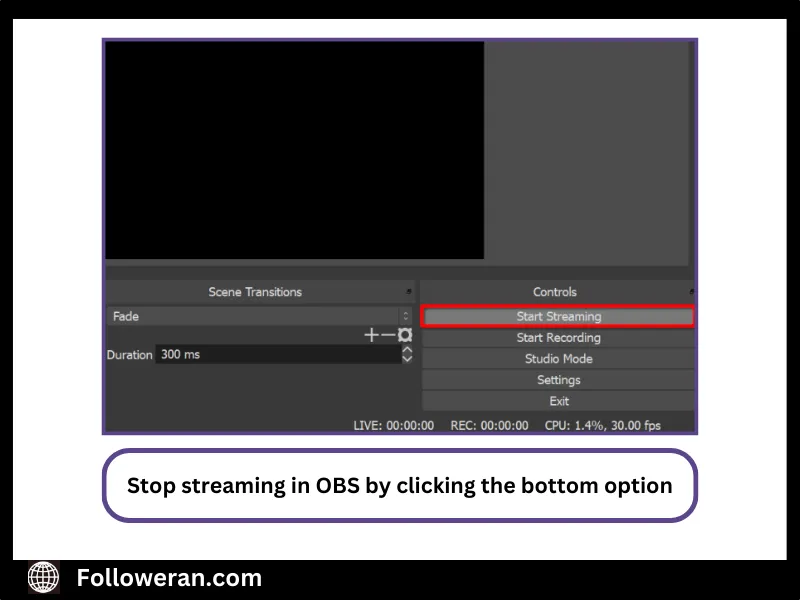
2. Press “Start Streaming” in your broadcasting software.
3. Edit Stream Info on Twitch:
– Go to your Twitch dashboard and set an engaging title, choose a game category, and add relevant tags.
Step 9: Engage with Your Audience
1. Monitor Chat: Keep an eye on chat interactions during your stream.
2. Respond to Viewers: Engage with comments and questions to build a community.
Step 10: End Your Stream
1. Stop Streaming in OBS/Streamlabs by clicking “Stop Streaming.”
2. Review Performance Metrics on your Twitch dashboard after ending the stream to understand viewer engagement.
Services like Twitch SMM Panel are valuable for managing your channel’s growth. This Panel allows you to automate the process of gaining followers, viewers, and engagement, which is crucial for maintaining a steady stream of traffic to your channel.
Best Time to Stream on Twitch
Knowing how to stream on Twitch effectively also involves timing your broadcast for maximum reach. The best time to stream on Twitch varies based on your audience, but generally, weekdays in the late afternoon or evening are optimal. On weekends, evenings and nights tend to work best, as most viewers are free and actively watching streams.
To increase your chances of being noticed, consider multistreaming. You can stream on Twitch and YouTube at the same time, allowing you to reach both Twitch and YouTube audiences simultaneously. This strategy can significantly boost your visibility and help you grow your fan base.
Enhance Your Stream with Additional Services
Building a successful Twitch channel takes more than just consistent streaming; you need to leverage various tools to boost your visibility. Additionally, if you’re looking to buy Twitch viewers or want to grow your audience organically, tools like free Twitch views are great options for streamers who want to enhance their visibility in the competitive Twitch space.
These services, such as Free Twitch Followers, help attract initial attention to your stream, which can lead to more organic growth as you gain followers. Whether you’re just starting out or looking to take your channel to the next level, utilizing these services strategically can give you the edge you need to stand out.
Conclusion
In summary, how to stream on Twitch is just the beginning of your journey as a content creator. With the right setup, stream settings, and strategies, you can maximize your engagement and grow your channel. Using tools like SMM Panel or choosing to stream on Twitch and YouTube at the same time will allow you to expand your reach. Start streaming today, and with persistence and dedication, you’ll see your community thrive!
FAQs
1. What equipment do I need to stream on Twitch?
you’ll need a good computer or gaming console, a microphone, a webcam (optional), and reliable internet connection.
2. How do I start streaming on Twitch?
Create a Twitch account, download streaming software like OBS or Streamlabs, connect your account, set up your stream settings, and click “Go Live.”
3. Can I stream from my console?
Yes, you can stream directly from consoles like PS4 or Xbox by using their built-in streaming features or the official Twitch app.
4. Do I need a webcam to stream?
A webcam is not mandatory, but it enhances viewer engagement by allowing them to see you while you play.
5. What content can I stream on Twitch?
You can stream various content including video games, music performances, creative arts, talk shows, and even cooking.



Leave a Review